
Congratulations on your purchase of the Canon AE-1, an iconic 35mm SLR film camera․ This instruction manual provides a comprehensive guide to understanding and mastering its features, ensuring optimal performance and troubleshooting common issues for both beginners and advanced photographers․
Overview of the Canon AE-1 Camera
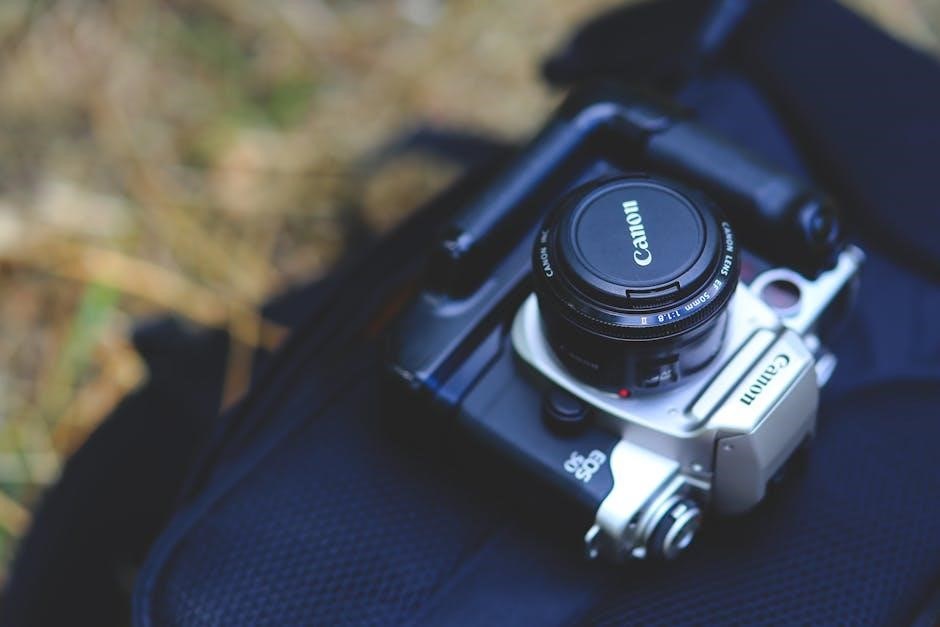
The Canon AE-1 is a groundbreaking 35mm SLR film camera introduced in 1976, renowned for its durability, ease of use, and advanced features․ Designed for both professional photographers and enthusiasts, it offers manual override, aperture priority, and shutter-speed priority modes, making it highly versatile․ The camera supports Canon FD lenses, ensuring exceptional optical quality․ Its compact and lightweight design, combined with intuitive controls, makes it a favorite among photographers․ The AE-1 is celebrated for its reliability and is often considered one of the most iconic film cameras ever produced, remaining popular even decades after its release․
Importance of the Instruction Manual
The Canon AE-1 instruction manual is an essential resource for unlocking the full potential of your camera․ It provides detailed guidance on setting up, operating, and maintaining the AE-1, ensuring optimal performance and troubleshooting common issues․ Whether you’re a novice or an experienced photographer, the manual offers clear instructions for mastering the camera’s features, such as exposure modes, film loading, and flash usage․ By following the manual, you can avoid operational errors and achieve the best possible results․ Its comprehensive coverage makes it indispensable for anyone seeking to fully understand and utilize their Canon AE-1 effectively․
Camera Features and Specifications
The Canon AE-1 is a 35mm SLR film camera, introduced in 1976, featuring manual controls, aperture priority mode, and compatibility with Canon FD lenses․ Its robust design and intuitive interface make it a timeless choice for photographers of all skill levels․
Key Components of the Canon AE-1
The Canon AE-1 features a 35mm film format, manual focus, and a built-in light meter for precise exposure control․ It includes a fixed eye-level pentaprism viewfinder, shutter speeds from 2 seconds to 1/1000th of a second, and a Bulb mode for long exposures․ The camera operates with a battery, typically a 4LR44, and includes a film advance lever, ASA setting dial, and self-timer․ Constructed with a durable copper-aluminum alloy body, the AE-1 is both robust and lightweight, making it a versatile tool for photographers of all levels․
Technical Specifications and Capabilities
The Canon AE-1 is a 35mm film SLR camera featuring a horizontally traveling focal-plane shutter with speeds from 2 seconds to 1/1000th of a second, plus Bulb mode․ It uses a center-weighted averaging light meter with a silicon photocell for accurate exposure measurement․ The camera supports Canon FD and FL lenses, offering compatibility with a wide range of optics․ Film speed is adjustable from ASA 12 to 3200, catering to various lighting conditions․ The AE-1 also includes a built-in flash contact and a self-timer, enhancing its versatility․ Powered by a 4LR44 battery, it combines durability with a lightweight copper-aluminum alloy body, making it a reliable choice for photographers․
Naming the Parts of the Canon AE-1
The Canon AE-1’s top features the shutter button, film advance lever, and exposure compensation dial․ The bottom includes the battery compartment and tripod socket for stability․
Top View of the Camera
The top view of the Canon AE-1 reveals essential controls for operating the camera․ The shutter button is located on the right, used to capture images․ Next to it is the film advance lever, which winds the film to the next frame after each shot․ The exposure compensation dial is positioned above the shutter button, allowing adjustments to exposure settings․ A frame counter displays the number of exposures taken․ These components are intuitively placed for easy access, ensuring smooth operation during photography․ Understanding their layout is key to mastering the camera’s functionality and capturing high-quality images efficiently․
Bottom View of the Camera
The bottom view of the Canon AE-1 features the tripod socket, located in the center, which allows for secure mounting on a tripod or stabilizing base․ This ensures steady shooting, especially in low-light conditions․ The battery compartment is also accessible from the bottom, housing the camera’s power source․ These components are designed for practicality, enabling photographers to maintain stability and power during use․ The bottom view highlights the camera’s durability and ergonomic design, ensuring reliable performance in various shooting environments while keeping essential functions within easy reach for quick adjustments and setups․
Loading Film into the Canon AE-1
Loading film into the Canon AE-1 is a straightforward process․ First, align and insert the film into the take-up spool․ Advance the film to the first frame and set the film speed (ASA) to ensure proper exposure․ Detailed steps are provided in later sections for optimal results․
Aligning and Inserting the Film
To load film into the Canon AE-1, start by opening the camera back․ Pull the film leader out of the cassette and align it with the red mark on the take-up spool․ Gently insert the leader into the spool’s slot, ensuring it is securely seated․ Close the camera back and pull out any slack from the film․ The film is now properly aligned and ready for advancement․ Make sure the film is not twisted or improperly positioned, as this could cause loading issues․ Once aligned, proceed to advance the film to the first exposure frame using the film advance lever․ The camera will click softly when the film is seated correctly․
Advancing the Film
To advance the film in the Canon AE-1, use the film advance lever located on the top right of the camera․ Pull the lever downward in a smooth, 30-degree motion until it stops, indicating the film has advanced to the next frame․ You will hear a distinct click when the film is properly advanced; Ensure the frame counter on the top plate increments correctly after each advance․ Avoid advancing the film more than once, as this could expose the same frame multiple times․ After advancing, the camera is ready to take the next shot․ Always check the frame counter to confirm the film position before shooting․
Setting the Film Speed (ASA)
To set the film speed (ASA) on the Canon AE-1, locate the ASA dial on the top left of the camera․ Lift and turn the dial to align the desired ASA value with the white dot․ The ASA range is from 12 to 3200, allowing compatibility with various film types․ Ensure the dial clicks into place for accurate setting․ The ASA setting determines the camera’s sensitivity to light, so it’s crucial to match it to the film’s speed for proper exposure․ After loading the film, confirm the ASA is set correctly before shooting․ Do not change the ASA once the film is loaded, as this can lead to incorrect exposures․

Operating Modes of the Canon AE-1
The Canon AE-1 offers three automatic exposure modes: Programmed AE, Shutter-Speed Priority AE, and Aperture Priority AE, plus manual override for greater creative control over your photography․
Programmed AE Mode
The Programmed AE Mode on the Canon AE-1 is an automatic exposure mode designed for ease of use, making it ideal for beginners and professionals alike․ In this mode, the camera automatically selects both the shutter speed and aperture to ensure a perfectly exposed image․ It is suitable for most shooting conditions and provides a hassle-free experience․ The mode is particularly useful for capturing candid moments or when you need quick results without manual adjustments․ While it offers convenience, it also allows for manual override if desired, giving you flexibility when needed․ This mode is a cornerstone of the AE-1’s functionality, simplifying photography while maintaining high-quality results․
Shutter-Speed Priority AE Mode
The Shutter-Speed Priority AE Mode on the Canon AE-1 allows you to manually set the desired shutter speed, while the camera automatically adjusts the aperture to achieve the correct exposure․ This mode is ideal for controlling motion effects, such as freezing fast-moving subjects or creating blur for artistic effects․ By selecting the shutter speed, you gain creative control over the image’s dynamic․ The camera ensures the aperture compensates to maintain proper exposure, making it a versatile option for various lighting conditions․ This mode is particularly useful for sports, action, and low-light photography, offering a balance between creative control and automatic precision․
Aperture Priority AE Mode
The Aperture Priority AE Mode on the Canon AE-1 enables you to manually set the aperture, giving you control over depth of field․ The camera automatically adjusts the shutter speed to ensure proper exposure․ This mode is ideal for photographers who want to creatively manage the focus and blur in their images․ By selecting a smaller aperture, you can achieve a larger depth of field, while a larger aperture will isolate subjects with a shallow focus․ This mode is particularly useful for portrait and landscape photography, allowing you to prioritize artistic control over the image’s depth and composition while relying on the camera to handle exposure timing;
Exposure Control and Metering
The Canon AE-1 features a built-in light meter for precise exposure control․ It offers manual override options, allowing adjustments for creative photography․ Use the meter to ensure accurate lighting readings․
Understanding the Light Meter
The Canon AE-1 features a built-in, through-the-lens (TTL) light meter for precise exposure control․ It uses a center-weighted metering system, emphasizing the central frame area, ideal for portraits․ The meter supports multiple modes, including Program AE, Shutter-Speed Priority, and Aperture Priority, allowing photographers to adjust settings based on creative needs․ Exposure compensation can be manually adjusted for fine-tuning․ The meter’s accuracy is crucial, so regular battery checks and proper lens maintenance are essential․ The AE-1’s light meter is user-friendly, aiding both beginners and professionals in mastering exposure principles without external tools․ Regular cleaning of the lens ensures accurate readings, maintaining optimal performance over time․
Adjusting Exposure Compensation
To achieve precise control over your images, the Canon AE-1 allows for manual adjustment of exposure compensation․ This feature is accessed via the exposure compensation dial located on the left side of the camera․ By rotating the dial, you can increase or decrease exposure by up to two stops (+2 or -2 EV)․ This adjustment is particularly useful for correcting meter readings in challenging lighting conditions, such as backlit or high-contrast scenes․ The meter will automatically adjust the aperture or shutter speed based on the mode in use, ensuring your final image reflects your creative vision․ Always remember to reset the dial to the neutral position after use to avoid unintended exposure changes in subsequent shots․
Using Exposure Bracketing
Exposure bracketing on the Canon AE-1 allows you to capture a series of images at varying exposures, ensuring optimal results in challenging lighting conditions․ To use this feature, set the camera to Manual mode and adjust the exposure compensation dial to your desired settings․ Bracketing is achieved by manually adjusting the aperture or shutter speed between shots․ Typically, photographers take three exposures: one at the metered value, one slightly overexposed, and one underexposed․ This technique is particularly useful for high-contrast scenes, such as landscapes or interiors, where capturing a wide dynamic range is essential․ Bracketed images can later be combined using post-processing techniques for enhanced results․
Using Flash with the Canon AE-1
The Canon AE-1 supports flash photography with its built-in flash or an external unit, offering versatile lighting control in various modes, including AE flash and manual override options․
Built-in Flash Capabilities
The Canon AE-1 features a convenient built-in flash for capturing images in low-light conditions․ The flash automatically activates in AE mode, ensuring balanced exposures․ It supports AE flash mode, allowing seamless integration with the camera’s metering system․ The flash coverage is suitable for lenses with a focal length of 35mm or longer, making it ideal for everyday photography․ For manual control, users can activate the flash independently․ The guide number of 13 (at ASA 100) provides sufficient illumination for most situations․ This feature enhances versatility, enabling photographers to achieve professional results without the need for external flash units, making the AE-1 a robust choice for various lighting scenarios․
Connecting an External Flash Unit
To enhance your photography, the Canon AE-1 supports the use of external flash units for greater control and power․ The camera features a hot shoe mount on top, allowing seamless connection of compatible flash devices․ Simply align the flash unit with the hot shoe and slide it into place until it clicks․ For optimal results, use a Canon-dedicated flash or ensure compatibility with the camera’s flash system․ When using an external flash, set both the camera and flash to manual mode for precise control over exposure settings․ Adjust the aperture and shutter speed according to the flash’s guide number for perfectly balanced lighting․ This feature provides flexibility for professional-level photography in various lighting conditions․

Additional Accessories for the Canon AE-1
The Canon AE-1 supports a variety of accessories, including compatible lenses, grips, and cases, to enhance functionality and portability․ Use the built-in grip for better handling and explore recommended cases and straps for protection and convenience․
Compatible Lenses and Accessories
The Canon AE-1 is designed to work seamlessly with Canon FD lenses, offering a wide range of focal lengths and apertures for diverse photography needs․ The camera supports both FD and non-FD lenses, with the latter requiring manual stop-down metering․ Popular choices include the 50mm f/1․8, 35mm f/2, and 70-200mm zoom lenses․ Additionally, the AE-1 is compatible with accessories like the Canon Auto Winder A for faster film advancement and the Canon Speedlite flash units for enhanced lighting control․ These accessories enhance the camera’s functionality, making it versatile for both casual and professional use․
Using the Camera’s Built-in Grip
The Canon AE-1 features a built-in grip designed for comfortable handling and easy access to controls․ This ergonomic design reduces fatigue during extended shooting sessions․ To use the grip effectively, hold the camera firmly with your right hand, placing your thumb on the back for stability․ Your fingers should naturally curve around the grip, allowing easy reach to the shutter button, aperture ring, and other controls․ The grip’s texture ensures a secure hold, even in challenging conditions․ This design enhances overall camera control, making it ideal for both casual and professional use․ Proper grip technique is essential for steady shooting and optimal performance with the Canon AE-1․
Recommended Cases and Straps
The Canon AE-1 can be paired with various cases and straps to enhance protection and convenience․ Recommended options include high-quality leather cases that safeguard the camera and lenses, while neoprene or nylon cases offer lightweight, weather-resistant protection․ For added comfort, consider using a padded neck strap or wrist strap, which provide secure handling during extended use․ These accessories are designed to complement the camera’s ergonomic design, ensuring durability and ease of transport․ Investing in a reliable case or strap is essential for maintaining the camera’s condition and optimizing your shooting experience, whether for professional or casual photography․

Maintenance and Troubleshooting
Regular cleaning of the camera and lenses ensures optimal performance․ Troubleshooting common issues like shutter malfunctions or light meter inaccuracies can be addressed with simple adjustments or professional servicing․
Cleaning the Camera and Lenses
Regular cleaning is essential to maintain the Canon AE-1’s performance․ Use a soft, dry cloth to wipe the camera body and external surfaces․ For the lenses, employ a microfiber cloth and lens cleaning solution to remove smudges and fingerprints․ Avoid harsh chemicals or abrasive materials that could damage the coatings․ Clean the viewfinder and mirror gently with a soft brush or compressed air․ Never touch the lens surfaces with bare hands, as oils can leave residue․ Store the lens cap when not in use to prevent dust accumulation․ Proper maintenance ensures sharp images and prolongs the camera’s lifespan․
Troubleshooting Common Issues
If the Canon AE-1 fails to operate, check the battery condition and ensure film is loaded correctly․ A non-firing shutter may indicate low battery power or improper film advancement․ For exposure issues, verify the ASA setting matches the film speed and ensure the lens is clean․ If the film counter does not advance, check for jammed film or improper loading․ Blurred images may result from incorrect focus or shaky hands․ For persistent problems, consult the manual or contact a professional․ Regular maintenance and proper handling can prevent many common issues, ensuring reliable performance and high-quality photography with your Canon AE-1․
Storing the Camera Properly
To maintain the performance and longevity of your Canon AE-1, proper storage is essential․ Clean the camera and lenses thoroughly before storage to prevent dirt or moisture damage․ Use a lens cap to protect the lens from dust and scratches․ Store the camera in a cool, dry place, away from direct sunlight and extreme temperatures․ Avoid humid environments, as moisture can damage internal components․ Consider using silica gel packets to absorb moisture․ Place the camera in its original case or a protective bag to shield it from physical damage․ For long-term storage, remove batteries to prevent corrosion․ Regularly inspect the camera during storage to ensure it remains in optimal condition․
The Canon AE-1 remains a legendary camera, celebrated for its durability and intuitive design․ By following this manual, photographers can master its features and capture timeless moments effortlessly․
Legacy of the Canon AE-1
The Canon AE-1, introduced in 1976, revolutionized photography with its advanced automatic features and user-friendly design․ It became an iconic tool for both professionals and hobbyists, blending innovation with accessibility․ Known for its durability and intuitive controls, the AE-1 empowered photographers to explore creative possibilities effortlessly․ Its impact on the industry was profound, setting a new standard for SLR cameras․ Decades later, the AE-1 remains a cherished collectible and a testament to Canon’s commitment to excellence․ Its legacy continues to inspire photographers, making it a timeless classic in the world of film photography․
Final Tips for Getting the Most Out of Your Camera
To maximize your experience with the Canon AE-1, experiment with different film stocks to explore varying aesthetics․ Regularly clean the lens and camera body to maintain image quality․ Practice shooting in manual mode to refine your understanding of exposure․ Store the camera in a cool, dry place to preserve its longevity․ Consider experimenting with accessories like extension tubes or close-up lenses for creative effects․ Finally, embrace the joy of film photography by shooting intentionally and reviewing your results to learn and improve; These practices will help you unlock the full potential of your Canon AE-1 and create lasting memories․