
Welcome to the 4L60 rebuild manual, your comprehensive guide to successfully rebuilding the 4L60 transmission․ This manual covers everything from disassembly to reassembly, ensuring a smooth process for both beginners and experienced technicians․
1․1 Overview of the 4L60 Transmission
The 4L60 transmission, a widely used General Motors automatic transmission, is known for its durability and versatility․ It features a four-speed gear system with an overdrive, making it suitable for various vehicles, from passenger cars to light trucks․ The 4L60 is popular among enthusiasts due to its strength and the availability of aftermarket parts for performance upgrades․ Its gear ratio range of 3․06:1 to 0․70:1 provides smooth acceleration and efficient highway cruising․ Common in GM vehicles from the late 1980s to the early 2000s, the 4L60 has become a favorite for rebuilding projects, offering a balance of reliability and tunability for both stock and modified applications․
1․2 Importance of Proper Rebuilding Techniques
Proper rebuilding techniques are crucial for ensuring the longevity and performance of the 4L60 transmission․ Improper methods can lead to premature wear, reduced efficiency, or even complete failure․ Attention to detail, such as correct clutch pack clearance, precise alignment of components, and thorough cleaning, is essential․ Using high-quality parts and tools ensures reliability and durability․ Additionally, following a step-by-step process, as outlined in repair manuals like the ATSG guide, minimizes errors․ Proper rebuilding also involves addressing common issues like servo alignment and bearing installation․ By adhering to proven techniques, you can achieve a rebuild that meets or exceeds OEM standards, providing smooth operation and improved performance for years to come․
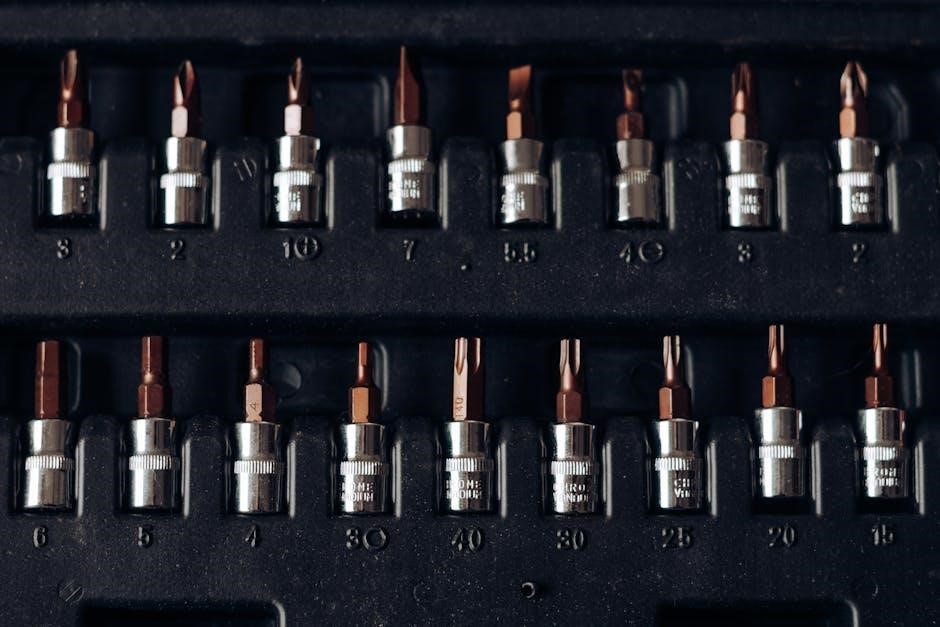
Tools and Materials Needed
A socket set, bearing puller, and torque wrench are essential․ Materials include gaskets, seals, clutch packs, filtered fluid, and a torque converter kit for a successful rebuild․
2․1 Essential Tools for the Rebuild
A socket set, wrenches, and screwdrivers are fundamental․ Specialized tools like a bearing puller, transmission pan gasket scraper, and seal installer are crucial․ A torque wrench ensures precise bolt tightening․ A dial indicator helps measure end play, and a press is needed for bearing removal․ A transmission-specific toolset, including a pump alignment tool and torque converter holding tool, simplifies the process․ Always refer to a service manual for specific requirements․ Ensure all tools are clean and well-organized to avoid damage or loss of small parts․ Proper tools are vital for a professional-grade rebuild and long-term reliability of the transmission․
2․2 Recommended Rebuild Kits and Parts
A high-quality master rebuild kit is essential for a successful 4L60 rebuild․ This kit typically includes seals, gaskets, bearings, and clutch packs․ Upgraded components like a high-capacity sun shell and heavy-duty torque converter are recommended for improved durability․ Consider aftermarket parts such as Raybestos or Alto clutches for enhanced performance․ A Sonnax smart shell and servo upgrades can significantly improve shifting and holding power․ Always use OEM or equivalent-quality parts to ensure reliability․ Consult a parts catalog or transmission manual to verify compatibility with your specific unit․ Avoid low-cost, inferior kits, as they often lead to premature wear․ Invest in a reputable rebuild kit to achieve optimal results and longevity for your transmission․

Disassembly Process
Begin by removing the transmission case and disconnecting the torque converter․ Carefully disassemble the valve body and other internal components, ensuring all parts are properly labeled and stored․
3․1 Removing the Transmission Case
Removing the transmission case is the first major step in the disassembly process․ Start by securing the transmission on a sturdy workbench or transmission jack․ Locate and remove the torque converter bolts, ensuring the converter is properly supported․ Next, carefully disconnect any remaining electrical connectors and fluid lines attached to the case․ Use a wrench or socket to remove the case bolts, working in a star pattern to avoid warping the case․ Gently pry the case apart from the main transmission assembly, taking care not to damage the mating surfaces․ Once separated, set the case aside for cleaning and inspection․ Always refer to a repair manual for specific torque specifications and bolt locations to ensure accuracy․
3․2 Disconnecting the Torque Converter
Disconnecting the torque converter is a critical step in the disassembly process․ Begin by removing the starter motor to access the torque converter bolts․ Use a socket wrench to remove the bolts securing the converter to the flywheel․ Carefully pull the converter straight out, ensuring it does not fall or damage the transmission input shaft․ Once removed, inspect the converter for any debris or damage․ If equipped, note the position of the converter’s studs relative to the transmission case for proper reinstallation later․ Always handle the torque converter with care, as it contains internal components that can be easily damaged․ Refer to a repair manual for specific instructions and torque specifications to avoid errors․ Proper alignment during reassembly is essential for optimal performance․
3․3 Taking Apart the Valve Body
Disassembling the valve body requires precision to avoid damage to its intricate components․ Start by removing the valve body from the transmission case, ensuring all electrical connectors are detached․ Use a torque wrench to remove the bolts securing the valve body․ Gently pull the valve body away, taking note of any alignment pins or clips that may be in place․ Once separated, carefully remove the solenoids and springs, organizing them to prevent misplacement․ Inspect each component for wear or damage, noting any parts that may need replacement․ Pay special attention to the throttle valve and pressure regulator, as these are critical for proper transmission function․ Always refer to a repair manual for specific torque specifications and reassembly instructions to ensure accuracy and prevent costly errors during the rebuild process․
Inspection and Cleaning
Inspection involves examining all components for wear or damage․ Use solvents and air compressors to clean parts․ Pay attention to gears, bearings, and clutch packs․ Early problem detection is crucial․
4․1 Inspecting Transmission Components
A thorough inspection is critical to identify wear or damage․ Start by examining the bearings and gears for scoring or excessive wear․ Check the clutch packs, especially the 3-4 clutch, for wear or damage․ Inspect the seals and gaskets for any signs of leakage․ The valve body should be checked for dirt or debris that may affect shifting․ Look for damaged or worn solenoids, as they can cause poor transmission performance․ Ensure the torque converter is in good condition and free from damage․ If any components are damaged, replace them with new or high-performance parts․ Consulting a repair manual can help identify specific issues and ensure accurate repairs․
4․2 Cleaning Procedures for Parts
Cleaning is essential to ensure proper function and prevent contamination․ Start by disassembling all components and soaking them in a solvent to remove grease and debris․ Use a parts washer or ultrasonic cleaner for small pieces like bearings and seals․ For larger components, such as the transmission case, use a wire brush and solvent to scrub away residue․ Once cleaned, rinse all parts with a clean solvent and dry with compressed air․ Pay extra attention to the valve body and clutch packs, as dirt can easily cause malfunction․ Proper cleaning ensures a smooth rebuild and prevents future issues․ Always wear gloves and work in a well-ventilated area when handling cleaning agents․

Reassembly Process
Reassembly requires careful attention to detail, ensuring all components align correctly․ Begin with the torque converter, followed by the valve body and transmission case, adhering to torque specifications and alignment procedures for optimal performance and reliability․
5․1 Reinstalling the Transmission Case
Reinstalling the transmission case is a critical step in the reassembly process․ Start by ensuring the case is clean and free of debris․ Align the case with the engine and transmission mounts, making sure it fits securely․ Tighten the mounting bolts gradually in a star pattern to avoid warping the case․ Reattach the torque converter, ensuring it is properly seated and aligned with the input shaft․ Double-check all connections, such as the cooler lines and electrical connectors, to ensure they are secure and functioning correctly․ Refer to your repair manual for specific torque specifications and alignment procedures to guarantee a precise fit and prevent damage during operation․
5․2 Reattaching the Torque Converter
Reattaching the torque converter requires precision to ensure proper alignment and function․ Start by aligning the torque converter with the input shaft, ensuring the splines match up correctly․ Gently slide the converter into place, making sure it seats fully against the transmission․ Secure it using the bolts provided in your rebuild kit, tightening them in a star pattern to avoid misalignment․ Double-check that the converter is properly engaged with the crankshaft and that all electrical connectors are securely attached․ Refer to your manual for torque specifications to ensure the bolts are tightened correctly․ Proper installation is crucial for smooth power transfer and to prevent damage to the transmission or engine․
5․3 Reassembling the Valve Body
Reassembling the valve body requires careful attention to detail to ensure proper hydraulic control․ Start by cleaning and inspecting all components, including solenoids, pistons, and springs․ Install the solenoids and electrical connectors, ensuring they are securely fastened․ Next, reattach the valve body to the transmission case, aligning the gasket properly․ Tighten the bolts in a star pattern to avoid warping․ Reinstall the manual valve and linkages, ensuring smooth operation․ Refer to your manual for torque specifications and proper alignment․ Avoid overtightening, as this can damage the valve body․ Finally, test the transmission’s shifting to ensure the valve body functions correctly․ Proper reassembly is critical for optimal performance and control․

Upgrades and Modifications
Explore performance upgrades like high-capacity clutch packs, reinforced bands, and aftermarket torque converters․ Installing components like Koleen steels and Alto Red Clutches enhances durability and performance․
6․1 Common Upgrades for Performance
When rebuilding your 4L60 transmission, consider performance upgrades to enhance durability and capability․ High-capacity clutch packs and reinforced bands improve heat resistance and torque handling․ Upgrading to Koleen steels and Alto Red Clutches provides superior friction material for increased strength․ Installing a Sonnax servo or smart shell enhances hydraulic pressure control, ensuring smoother and firmer shifts․ Wideband and 5-pinion planetary gear sets are popular for added strength and reliability․ These modifications are ideal for high-performance applications, towing, or racing․ Always use high-quality parts and follow proper installation techniques to maximize the benefits of these upgrades․
6․2 Installing Aftermarket Components
Installing aftermarket components can significantly enhance your 4L60 transmission’s performance and durability․ Components like Sonnax servos, smart shells, and upgraded valve bodies are popular choices for improved shift quality and reliability․ These parts are designed to handle increased torque and heat, making them ideal for high-performance or heavy-duty applications․ Always ensure compatibility with your transmission model and follow manufacturer installation instructions carefully․ Proper alignment and torque specifications are crucial to avoid damage․ Consider consulting a professional if unsure, as improper installation can lead to premature wear or failure․ Quality aftermarket parts, when installed correctly, can elevate your transmission’s capabilities and extend its lifespan․

Troubleshooting Common Issues
Troubleshooting common issues during a 4L60 rebuild involves identifying symptoms like slipping, harsh shifting, or solenoid malfunctions․ Inspect solenoids, check fluid levels, and ensure proper torque converter engagement․ Diagnosing root causes ensures effective repairs․
7․1 Diagnosing Transmission Problems
Diagnosing transmission problems in a 4L60 rebuild requires a systematic approach․ Start by identifying symptoms such as slipping, harsh shifting, or delayed engagement․ Check the transmission fluid level and condition, as low or contaminated fluid can cause malfunctions․ Inspect solenoids for proper operation and ensure all electrical connections are secure․ Use a scan tool to retrieve trouble codes, which can pinpoint issues like faulty sensors or solenoid failures․ Visually inspect the torque converter and clutch packs for wear or damage․ If issues persist, refer to the ATSG manual or OEM guidelines for detailed troubleshooting steps․ Addressing problems early prevents further damage and ensures a successful rebuild․
7․2 Solving Specific Rebuild Challenges
During the 4L60 rebuild, common challenges include improper clutch pack clearance, misaligned servo pins, and faulty electrical connections․ To address these, ensure all components are cleaned and inspected thoroughly․ For clutch packs, use a micrometer to verify specifications․ If servo pins don’t align, check for debris or bent components․ Electrical issues can often be resolved by testing solenoids and connectors with a multimeter․ Consult the ATSG manual for precise measurements and troubleshooting steps․ Using the right tools, like a torque wrench, can prevent overtightening and damage․ If issues persist, consider seeking guidance from experienced technicians or transmission rebuild forums․ Proper documentation and patience are key to overcoming these challenges successfully․

Testing the Rebuilt Transmission
After reassembly, perform an initial startup and basic checks to ensure proper function․ Test the transmission under load to verify smooth shifting and durability․ Use the ATSG manual for detailed procedures and troubleshooting․ Address any issues promptly to ensure long-term reliability and performance․
8․1 InitialStartup and Basic Checks
8․1 Initial Startup and Basic Checks
After completing the reassembly, begin with a thorough pre-start inspection․ Ensure all electrical connectors are secure, fluid levels are correct, and the torque converter is properly seated․ Start the engine in park, allowing it to idle for a few minutes to circulate fluid․ Listen for unusual noises or vibrations․ Gradually test each gear, checking for smooth engagement and proper shifting․ Monitor the transmission’s response under light throttle․ Pay attention to any slipping, hesitation, or abnormal behavior․ If issues arise, refer to the ATSG manual for diagnostic guidance․ This initial phase is critical for identifying and addressing any potential problems before proceeding to load testing․
8․2 Performance Testing Under Load
Once the initial startup checks are completed, proceed to performance testing under load to assess the transmission’s operational integrity․ Begin by driving in a controlled environment, such as an empty parking lot, to evaluate gear engagement and shifting smoothness․ Pay attention to any signs of slipping, hesitation, or unusual noises, which may indicate issues like worn clutches or incorrect fluid levels․
Use a scan tool to monitor transmission performance and check for trouble codes․ Ensure the torque converter engages and disengages smoothly during acceleration and deceleration․ Gradually test under varying loads, such as towing or climbing inclines, to observe how the transmission responds․ If problems arise, consult the ATSG manual for diagnostic guidance and necessary repairs․ This step ensures the rebuilt transmission performs reliably under real-world conditions․
Rebuilding the 4L60 transmission is a rewarding process with proper guidance․ Refer to the ATSG manual for detailed instructions and seek support from transmission repair forums for troubleshooting․
9․1 Final Tips for a Successful Rebuild
For a successful 4L60 rebuild, always follow a detailed manual like the ATSG guide for precise instructions․ Invest in high-quality parts, such as Koleen steels and Alto Red Clutches, to ensure durability․ Watch DIY videos for visual guidance, especially during disassembly and reassembly․ Break the process into smaller, manageable steps to avoid overwhelmed․ Keep all components organized to prevent losing small parts․ Double-check alignment and torque specs to avoid costly mistakes․ Consult transmission forums or professionals if stuck․ Patience and attention to detail are key to a smooth rebuild․
9․2 Resources for Further Assistance
For additional guidance, refer to the ATSG 4L60E Transmission Repair Manual, a trusted resource for detailed instructions․ Online forums like GMT400․com offer valuable insights and troubleshooting tips․ YouTube channels provide step-by-step rebuild videos, such as the “Ultimate DIY 4L60E Rebuild Video․” Transmission specialists can also assist with complex issues․ Always consult multiple sources to ensure accuracy and confidence in your rebuild․ Remember, patience and attention to detail are crucial for a successful outcome․ Utilize these resources to address challenges and achieve professional results․